AutoHotkey | Android | Arduino | COMM140 | Fractals | Grammar Checkers | Knots | A Million Dots Activity | Processing | Processing for Scratch Users | Redbubble | Tutorials | Weather | World Time Meeting Planner | Favicon Generator.
Home > Tutorials > Auduino > Arduino UNO Demo
![]()
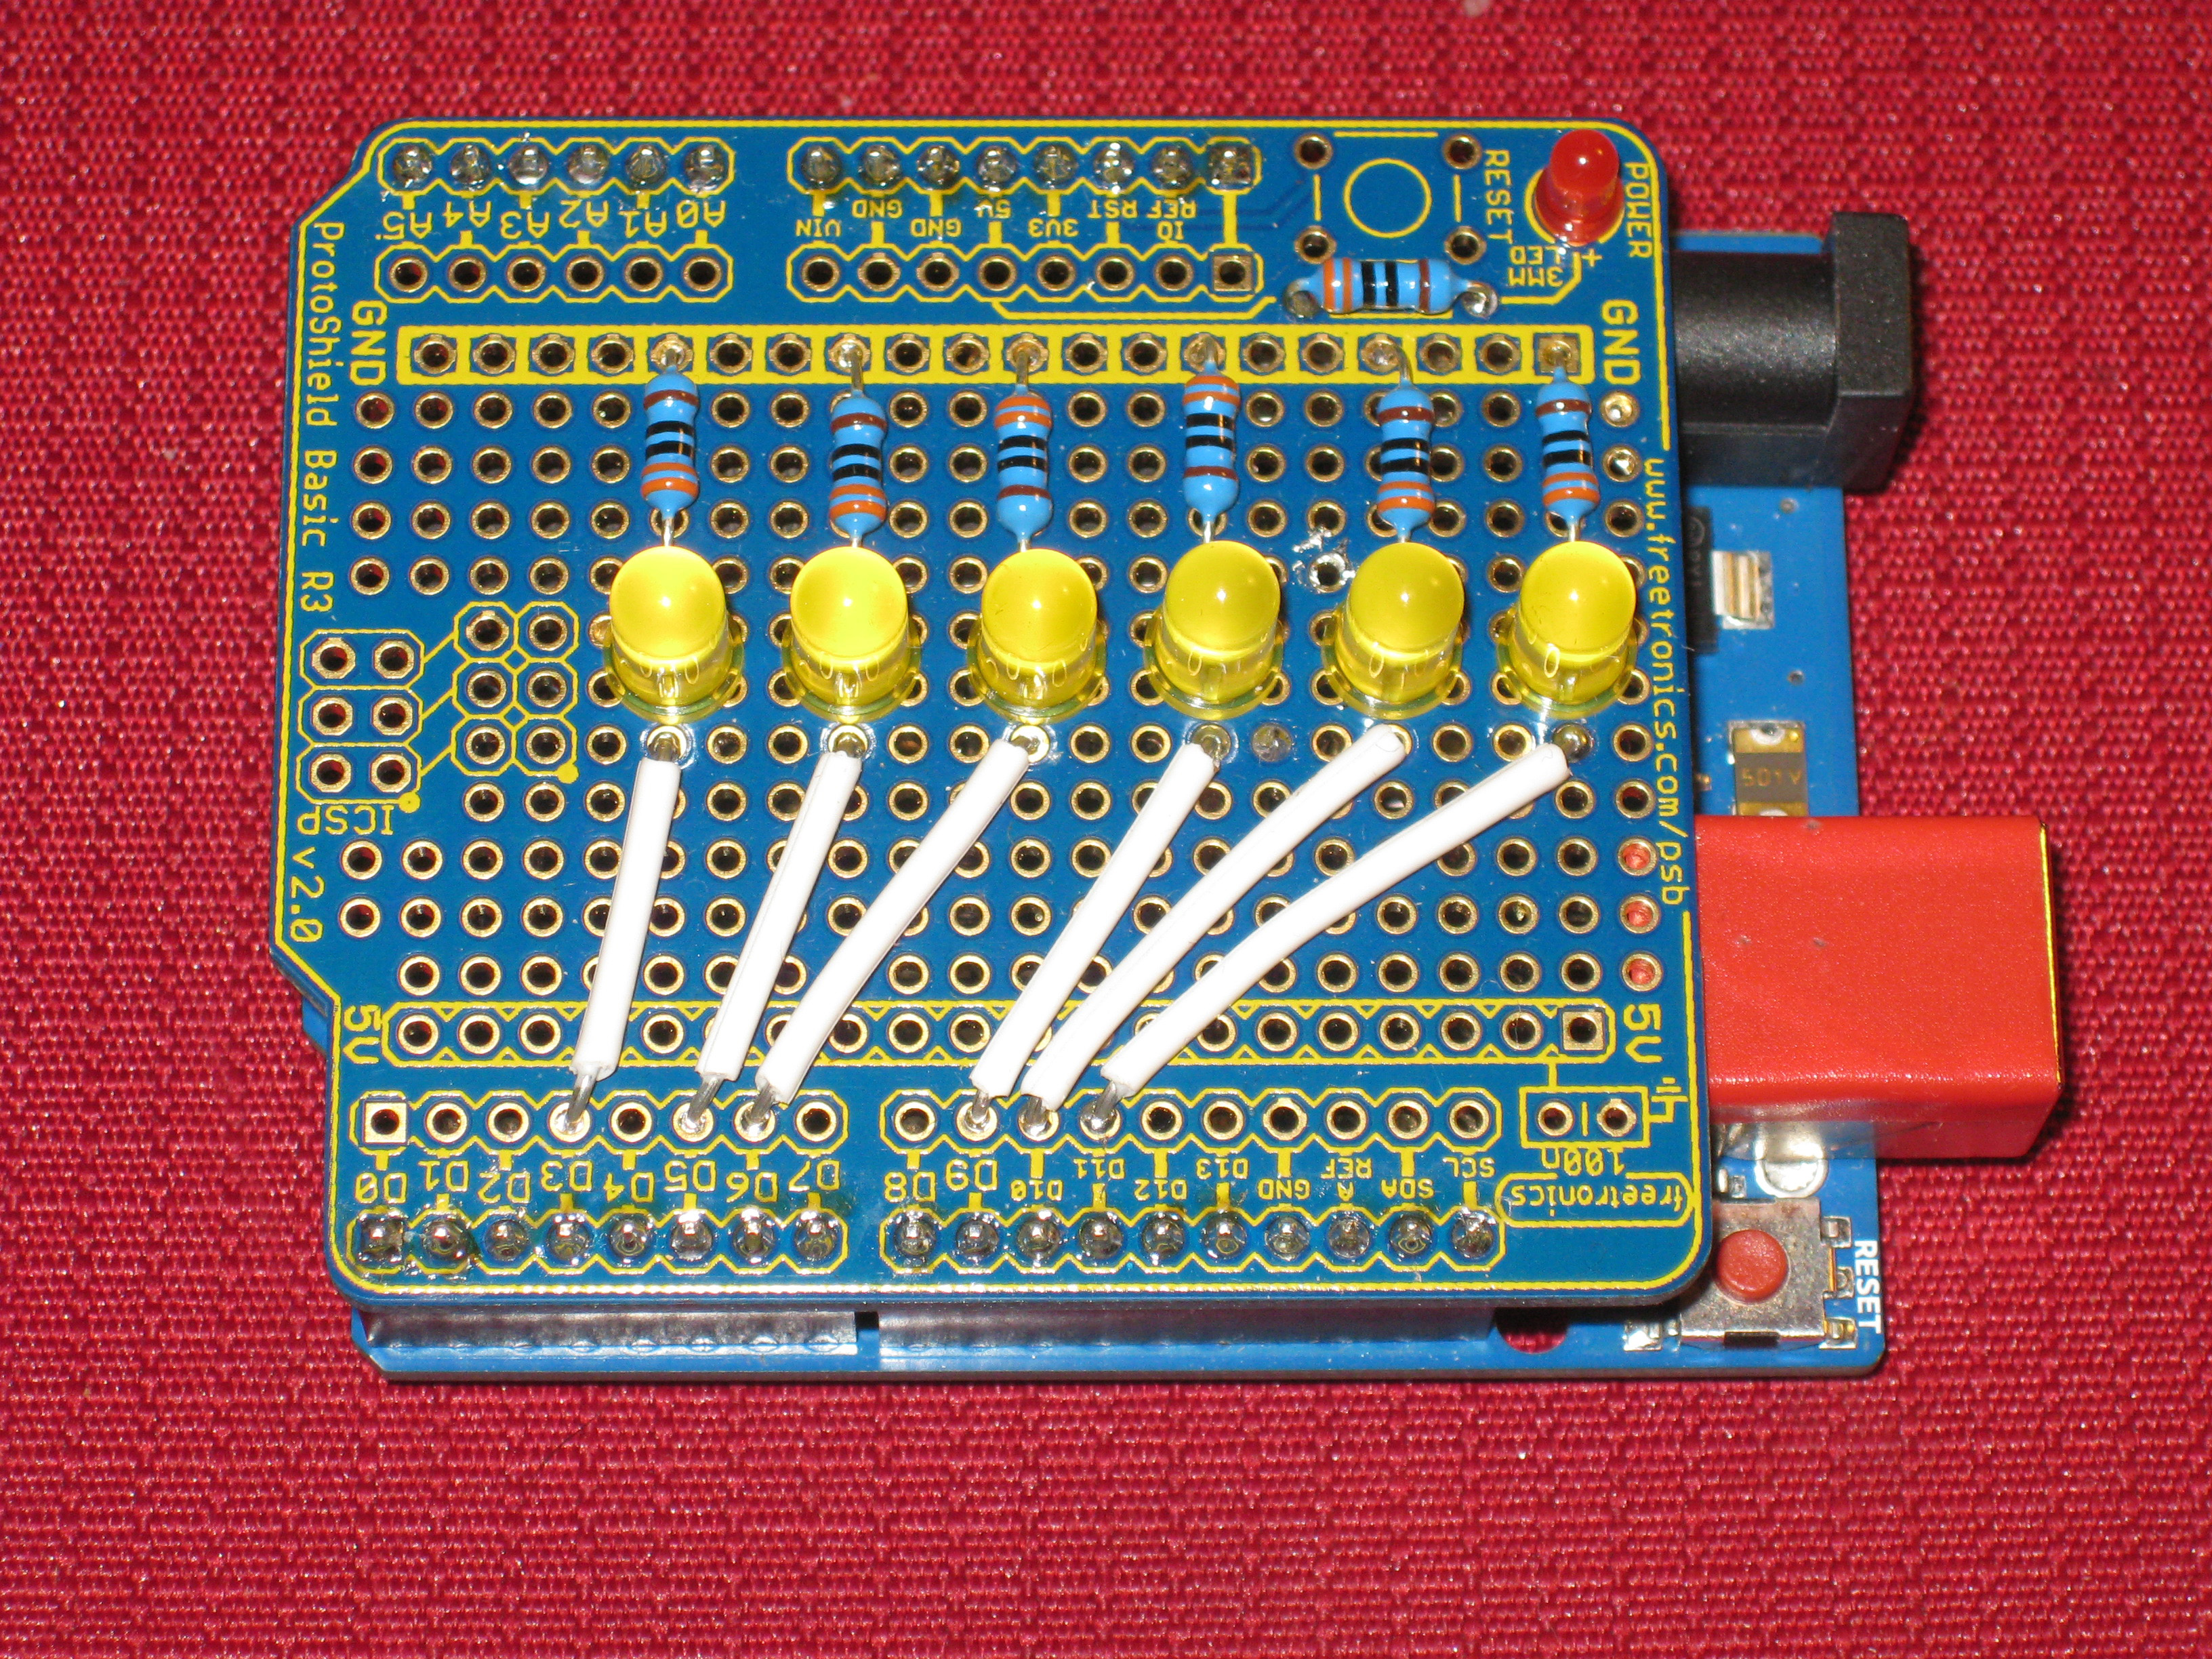
This is an Arduino UNO with a ProtoShield
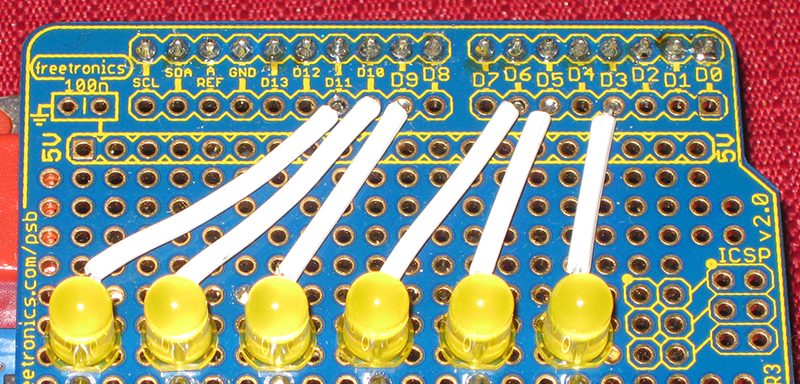
I have added 6 Leds to the board wired from the following Digital Outputs to ground
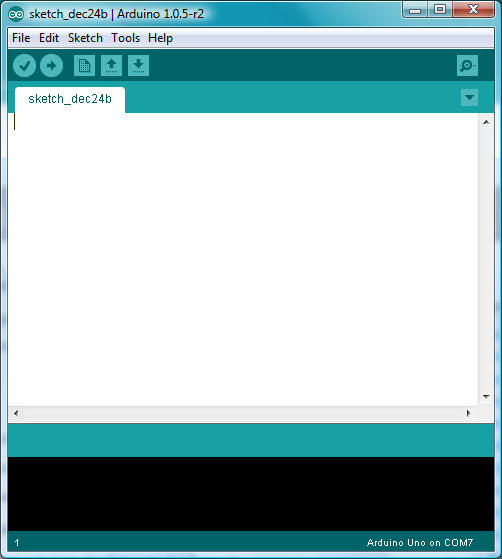
In order to be able to program this board you will need to install a copy of the Arduino IDE (integrated development environment).
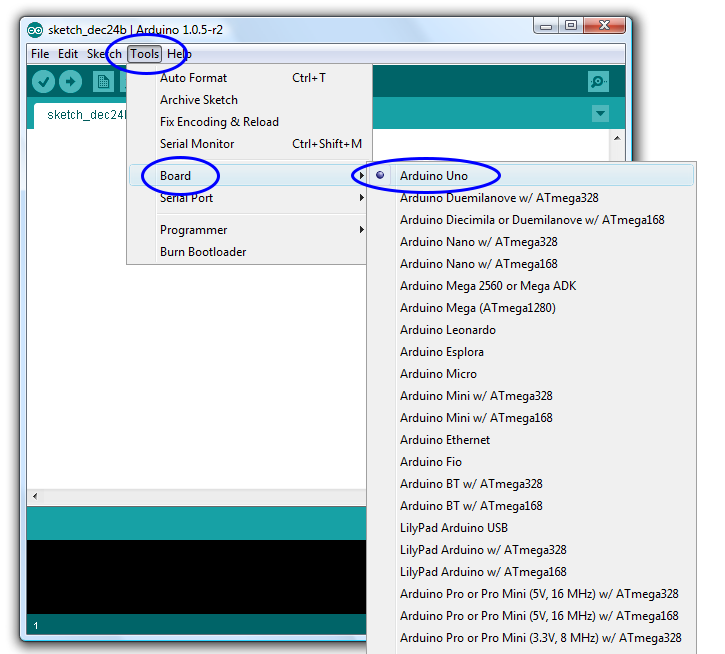
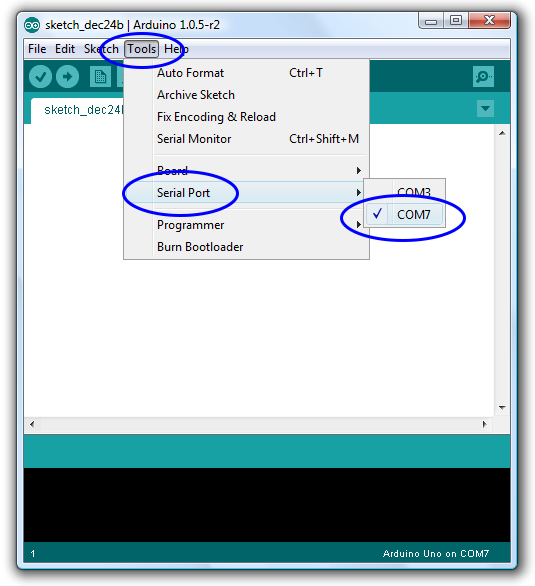
Once you have downloaded and installed the Arduino IDE you will have to select the correct Arduino board from the list. The board I am have lent you is an Arduino UNO.
When you plug the board into a computer for the first time you will have to install the drivers. This can sometimes be a little tricky. Hopefully this will work OK for you first time. If not try another USB port on the same computer, or even a different computer.
When the driver have been installed and the board is connecteed to the USB port your computer should recognise the board and add a new COM port to the list of com ports.
in my case its COM 7 your computer may list this as another COM port number larger than COM 3.
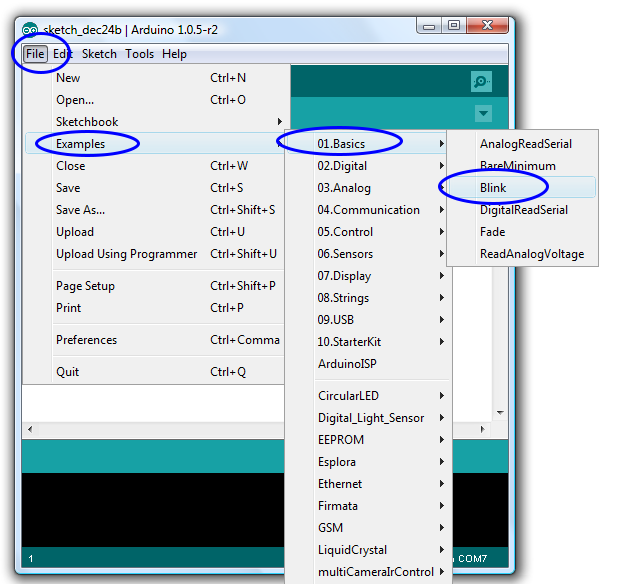
Next load up the example program BLINK
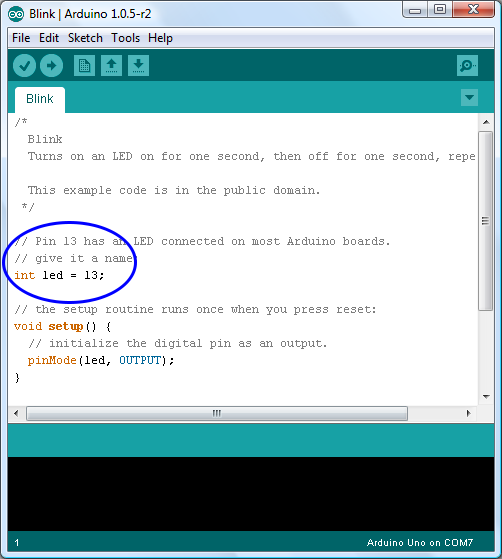
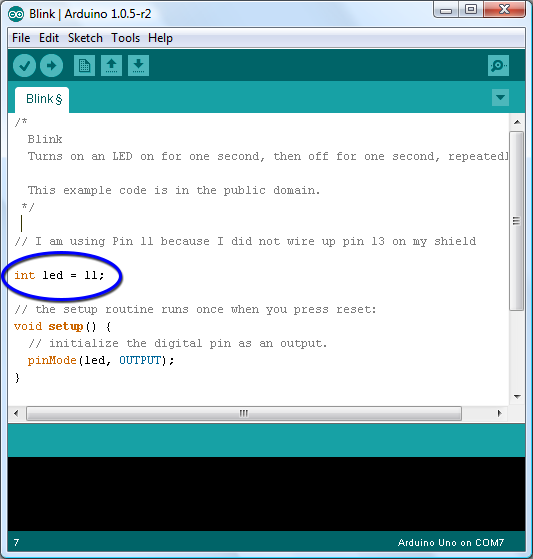
The example Blink program is designed to blink the built in LED on port D13. I have not used D13 on the shield so change the code to use D11
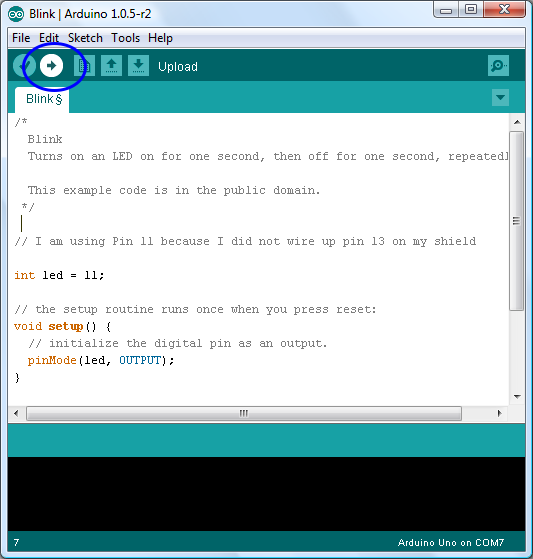
Upload the code and with luck you will see the LED on Port D11 blinking once a second

/*
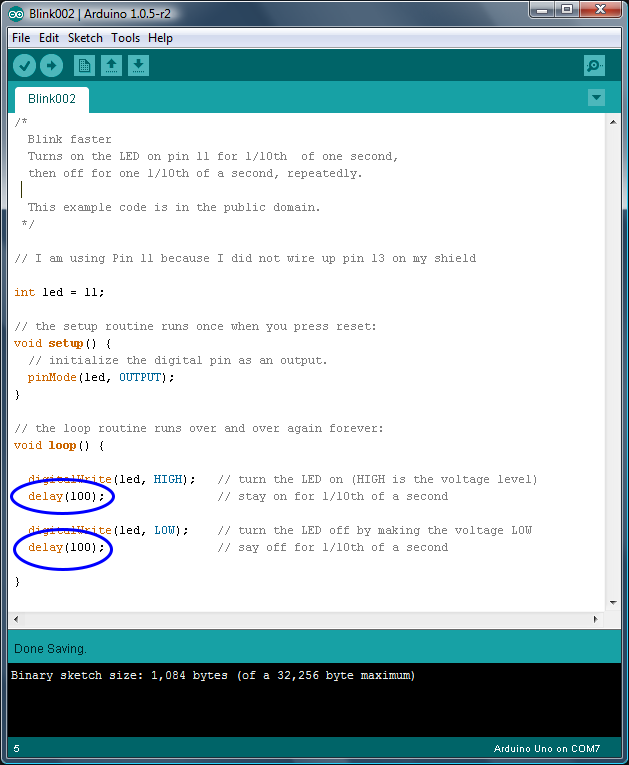
Blink all LEDS faster
Turns on all the LEDs for 1/10th of a second,
then off all the LEDs for 1/10th of a second, repeatedly.
This example code is in the public domain.
*/
// Define a fariable for each of the 6 LEDs
// we are counting from 0 to 5 which give us the 6 LEDs
int led0 = 11;
int led1 = 10;
int led2 = 9;
int led3 = 6;
int led4 = 5;
int led5 = 3;
// the setup routine runs once when you press reset:
void setup() {
// initialize the digital pins as an outputs.
pinMode(led0, OUTPUT);
pinMode(led1, OUTPUT);
pinMode(led2, OUTPUT);
pinMode(led3, OUTPUT);
pinMode(led4, OUTPUT);
pinMode(led5, OUTPUT);
}
// the loop routine runs over and over again forever:
void loop() {
digitalWrite(led0, HIGH); // turn the LED on (HIGH is the voltage level)
digitalWrite(led1, HIGH);
digitalWrite(led2, HIGH);
digitalWrite(led3, HIGH);
digitalWrite(led4, HIGH);
digitalWrite(led5, HIGH);
delay(100); // wait for 1/10 of a second
digitalWrite(led0, LOW); // turn the LED off by making the voltage LOW
digitalWrite(led1, LOW);
digitalWrite(led2, LOW);
digitalWrite(led3, LOW);
digitalWrite(led4, LOW);
digitalWrite(led5, LOW);
delay(100); // stay off for for a 1/10 of second
}
/*
Blink all LEDS in a set pattern
This example code is in the public domain.
*/
// set up variables for each hard wired LED on the shield that I made for this project
int led0 = 11;
int led1 = 3;
int led2 = 10;
int led3 = 9;
int led4 = 5;
int led5 = 6;
// these variables control how long each LED is on an how long it is off
int on = 50;
int off = 10;
void setup() {
// initialize the digital pins as an outputs.
pinMode(led0, OUTPUT);
pinMode(led1, OUTPUT);
pinMode(led2, OUTPUT);
pinMode(led3, OUTPUT);
pinMode(led4, OUTPUT);
pinMode(led5, OUTPUT);}
void loop() {
// this is the flashing pattern that repeats continually.
digitalWrite(led0, HIGH);
delay(on);
digitalWrite(led0, LOW);
delay(off);
digitalWrite(led1, HIGH);
delay(on);
digitalWrite(led1, LOW);
delay(off);
digitalWrite(led2, HIGH);
delay(on);
digitalWrite(led2, LOW);
delay(off);
digitalWrite(led3, HIGH);
delay(on);
digitalWrite(led3, LOW);
delay(off);
digitalWrite(led4, HIGH);
delay(on);
digitalWrite(led4, LOW);
delay(off);
digitalWrite(led5, HIGH);
delay(on);
digitalWrite(led5, LOW);
delay(off);
}
---
You may want to take a look at the Getting Started with Arduino page
APA citation:
Russell, R. (2016, August 15, 07:45 am). Arduino demo.
Retrieved February 24, 2026, from http://www.rupert.id.au/tutorials/Demo/index.php
Last refreshed: February 24 2026. 02:13.17 pm


 This work is licensed under a Creative Commons Attribution-NonCommercial-ShareAlike 2.5 License.